Prerequisites
Before diving in, you need a few things in place. I'm assuming you have a Juniper router running JunOS — this guide was written against JunOS 21.x but applies equally to 18.x and later releases. You'll need SSH access to the device and enough privilege to commit configuration changes, typically the
super-userlogin class or a custom class with the
configurepermission.
On the networking side, you need at least one established BGP session or the intent to bring one up. The examples here use two eBGP peers: one upstream provider and one downstream customer. You'll also want a clear picture of what you're trying to accomplish with route policy before you write a single term. Going into BGP policy work without a plan is how you end up leaking your entire routing table at 2 AM.
Specific requirements going in:
- JunOS 18.1 or later
- At least one configured BGP neighbor with an established or pending session
- Understanding of basic BGP concepts: AS numbers, NLRI, next-hop, MED, local preference
- Familiarity with the Junos commit model — policy changes don't take effect until you commit
Understanding Juniper Route Policies
Juniper's route policy model is genuinely elegant once it clicks. Policies live under
policy-optionsand are composed of terms. Each term has a
fromblock for matching conditions and a
thenblock for actions. Terms are evaluated top to bottom, and the first match wins. If no term matches, the implicit default action kicks in — and that default depends on where and how the policy is applied.
This is different from Cisco's route-maps, and I've seen engineers get bitten by the difference repeatedly. In JunOS, an import policy applied to an eBGP session has an implicit reject-all at the end. An export policy also implicitly rejects everything unless you explicitly accept. That last point trips people up constantly — you build a perfectly valid policy that matches routes and tags them with communities, forget the final
then acceptterm, and nothing gets advertised. The router isn't broken. Your policy is just doing exactly what you told it to.
Policies can reference three types of reusable building blocks: prefix lists defined under
policy-options prefix-list, AS-path regular expressions under
policy-options as-path, and BGP communities under
policy-options community. You can also reference other policies by name using
from policyinside a term, which lets you build modular, composable policy logic as your network grows in complexity.
Step-by-Step BGP Configuration
Step 1: Define Prefix Lists
Start by building your prefix lists. These are reusable objects that policy terms reference by name. I always define these first because it forces you to think concretely about which networks you actually want to permit or deny before writing a single policy term. Skipping this step and writing inline prefix-list-filter entries scattered through your policy makes long-term maintenance painful.
set policy-options prefix-list CUSTOMER-PREFIXES 172.16.10.0/24
set policy-options prefix-list CUSTOMER-PREFIXES 172.16.20.0/24
set policy-options prefix-list CUSTOMER-PREFIXES 172.16.30.0/24

set policy-options prefix-list INTERNAL-LOOPBACKS 10.0.0.0/24

set policy-options prefix-list DEFAULT-ROUTE 0.0.0.0/0
The
CUSTOMER-PREFIXESlist contains networks we're advertising to our upstream provider.
INTERNAL-LOOPBACKScovers loopback addresses we want reachable externally for management.
DEFAULT-ROUTEis used in import policy to explicitly accept the default if our provider sends it — and to set specific treatment on it.
Step 2: Create AS-Path Regular Expressions
AS-path filters let you match routes based on the AS path attribute. JunOS uses POSIX-style regex here, which is more powerful than what you get on other platforms but does require you to actually know regex. A few patterns that cover most real-world scenarios:
set policy-options as-path PEER-ORIGINATED "^65002$"
set policy-options as-path CUSTOMER-AS "^65003$"
set policy-options as-path ANY-AS ".*"
set policy-options as-path TRANSIT-THROUGH-PEER ".* 65002 .*"PEER-ORIGINATEDmatches only routes that originated directly from AS 65002 — the
^and
$anchors mean the path must contain exactly that AS and nothing else.
TRANSIT-THROUGH-PEERwould match any route where AS 65002 appears anywhere in the path, regardless of what else surrounds it. Use the anchored form when you want to accept only customer-originated routes, not routes that merely transited through them.
Step 3: Configure BGP Communities
Communities are how you tag routes with metadata that carries policy intent. They're invaluable for signaling routing decisions across peering boundaries and for implementing tiered treatment based on route origin. Define the communities you'll use before writing policy terms that reference them:
set policy-options community UPSTREAM-PEER members 65001:100
set policy-options community CUSTOMER-ROUTE members 65001:200
set policy-options community LOCAL-PREF-HIGH members 65001:300
set policy-options community BLACKHOLE members 65001:666
set policy-options community NO-EXPORT members no-export
The
no-exportwell-known community is built into JunOS — you don't need to spell out the numeric value 65535:65281. The others use the standard
ASN:valueformat. I use the local AS as the first octet so it's immediately clear which communities originate from my network versus communities sent by peers.
Step 4: Build the Route Policy
Now for the actual policy. Let's build both an import and export policy. The import policy controls what we accept from peers and how we treat it locally. The export policy controls what we advertise outbound.
Import policy for our upstream provider peer in AS 65002:
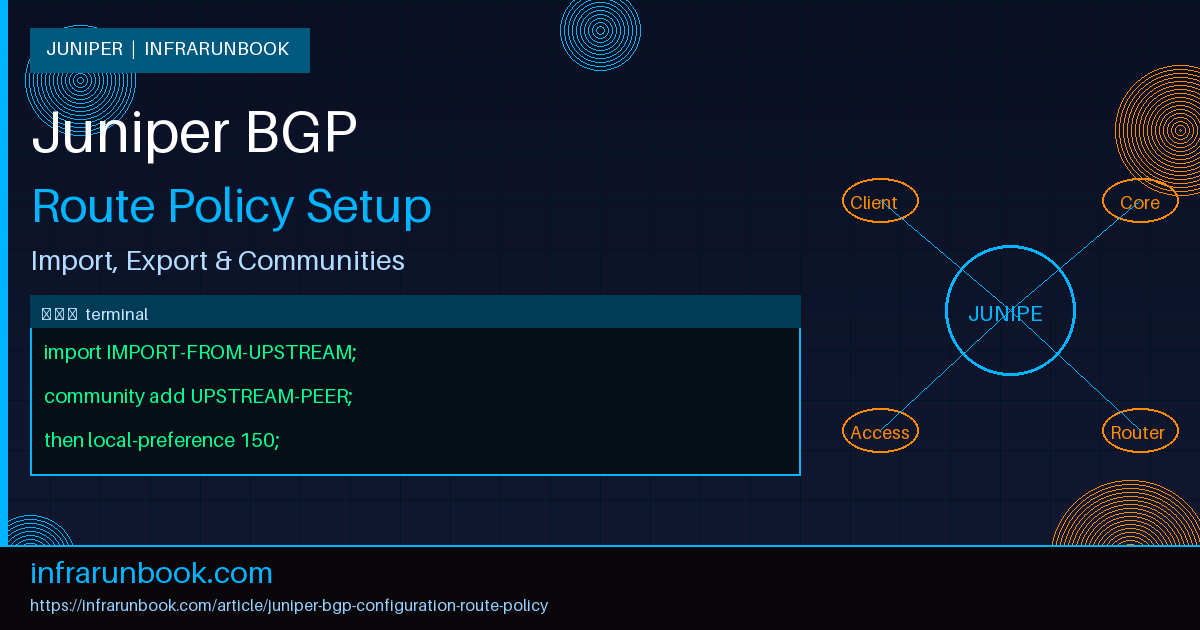
set policy-options policy-statement IMPORT-FROM-UPSTREAM term ACCEPT-DEFAULT from prefix-list DEFAULT-ROUTE
set policy-options policy-statement IMPORT-FROM-UPSTREAM term ACCEPT-DEFAULT then local-preference 150
set policy-options policy-statement IMPORT-FROM-UPSTREAM term ACCEPT-DEFAULT then community add UPSTREAM-PEER
set policy-options policy-statement IMPORT-FROM-UPSTREAM term ACCEPT-DEFAULT then accept

set policy-options policy-statement IMPORT-FROM-UPSTREAM term REJECT-RFC1918-10 from prefix-list-filter 10.0.0.0/8 orlonger
set policy-options policy-statement IMPORT-FROM-UPSTREAM term REJECT-RFC1918-10 then reject

set policy-options policy-statement IMPORT-FROM-UPSTREAM term REJECT-RFC1918-172 from prefix-list-filter 172.16.0.0/12 orlonger
set policy-options policy-statement IMPORT-FROM-UPSTREAM term REJECT-RFC1918-172 then reject

set policy-options policy-statement IMPORT-FROM-UPSTREAM term REJECT-RFC1918-192 from prefix-list-filter 192.168.0.0/16 orlonger
set policy-options policy-statement IMPORT-FROM-UPSTREAM term REJECT-RFC1918-192 then reject

set policy-options policy-statement IMPORT-FROM-UPSTREAM term ACCEPT-REMAINDER then accept
A few things worth noting. The bogon filter terms use inline
prefix-list-filterwith the
orlongerqualifier — this filters RFC 1918 space arriving from your upstream, which any responsible operator should do. In my experience, you'd be surprised how often providers accidentally leak private address space into eBGP sessions if you're not filtering it on your end. The final
ACCEPT-REMAINDERterm with no
fromconditions acts as a catch-all accept. Without it, anything that didn't match the earlier terms would hit the implicit reject at the end of the policy.
Now the export policy for the same upstream peer:
set policy-options policy-statement EXPORT-TO-UPSTREAM term ADVERTISE-CUSTOMER from prefix-list CUSTOMER-PREFIXES
set policy-options policy-statement EXPORT-TO-UPSTREAM term ADVERTISE-CUSTOMER then community set CUSTOMER-ROUTE
set policy-options policy-statement EXPORT-TO-UPSTREAM term ADVERTISE-CUSTOMER then accept

set policy-options policy-statement EXPORT-TO-UPSTREAM term ADVERTISE-LOOPBACKS from prefix-list INTERNAL-LOOPBACKS
set policy-options policy-statement EXPORT-TO-UPSTREAM term ADVERTISE-LOOPBACKS then accept

set policy-options policy-statement EXPORT-TO-UPSTREAM term REJECT-EVERYTHING then reject
This policy explicitly advertises customer prefixes and internal loopbacks, tags customer routes with a community, and rejects everything else. That final explicit reject isn't strictly necessary since the implicit default does the same thing for export, but I like being explicit — it makes intent obvious when someone reads the config six months from now.
Step 5: Apply Policies to BGP
Policies are useless until they're applied to BGP neighbors. Apply them at the group level when multiple peers share the same policy logic, or at the neighbor level for per-peer customization that overrides the group setting:
set protocols bgp local-as 65001
set protocols bgp group UPSTREAM-PROVIDERS type external
set protocols bgp group UPSTREAM-PROVIDERS import IMPORT-FROM-UPSTREAM
set protocols bgp group UPSTREAM-PROVIDERS export EXPORT-TO-UPSTREAM
set protocols bgp group UPSTREAM-PROVIDERS neighbor 192.168.1.2 peer-as 65002
set protocols bgp group UPSTREAM-PROVIDERS neighbor 192.168.1.2 description "Upstream Provider - AS65002"

set protocols bgp group CUSTOMER-PEERS type external
set protocols bgp group CUSTOMER-PEERS import IMPORT-FROM-CUSTOMER
set protocols bgp group CUSTOMER-PEERS export EXPORT-TO-CUSTOMER
set protocols bgp group CUSTOMER-PEERS neighbor 192.168.2.2 peer-as 65003
set protocols bgp group CUSTOMER-PEERS neighbor 192.168.2.2 description "Customer - AS65003"
Full Configuration Example
Here's the complete configuration in JunOS hierarchical format, ready to load in a
configuresession. This represents a realistic dual-peer setup for a network running AS 65001, with one upstream provider peer and one customer peer.
policy-options {
    prefix-list CUSTOMER-PREFIXES {
        172.16.10.0/24;
        172.16.20.0/24;
        172.16.30.0/24;
    }
    prefix-list INTERNAL-LOOPBACKS {
        10.0.0.0/24;
    }
    prefix-list DEFAULT-ROUTE {
        0.0.0.0/0;
    }
    as-path PEER-ORIGINATED "^65002$";
    as-path CUSTOMER-AS "^65003$";
    as-path ANY-AS ".*";
    community UPSTREAM-PEER members 65001:100;
    community CUSTOMER-ROUTE members 65001:200;
    community LOCAL-PREF-HIGH members 65001:300;
    community NO-EXPORT members no-export;
    policy-statement IMPORT-FROM-UPSTREAM {
        term ACCEPT-DEFAULT {
            from {
                prefix-list DEFAULT-ROUTE;
            }
            then {
                local-preference 150;
                community add UPSTREAM-PEER;
                accept;
            }
        }
        term REJECT-RFC1918-10 {
            from {
                prefix-list-filter 10.0.0.0/8 orlonger;
            }
            then reject;
        }
        term REJECT-RFC1918-172 {
            from {
                prefix-list-filter 172.16.0.0/12 orlonger;
            }
            then reject;
        }
        term REJECT-RFC1918-192 {
            from {
                prefix-list-filter 192.168.0.0/16 orlonger;
            }
            then reject;
        }
        term ACCEPT-REMAINDER {
            then accept;
        }
    }
    policy-statement EXPORT-TO-UPSTREAM {
        term ADVERTISE-CUSTOMER {
            from {
                prefix-list CUSTOMER-PREFIXES;
            }
            then {
                community set CUSTOMER-ROUTE;
                accept;
            }
        }
        term ADVERTISE-LOOPBACKS {
            from {
                prefix-list INTERNAL-LOOPBACKS;
            }
            then accept;
        }
        term REJECT-EVERYTHING {
            then reject;
        }
    }
    policy-statement IMPORT-FROM-CUSTOMER {
        term ACCEPT-CUSTOMER-PREFIXES {
            from {
                prefix-list CUSTOMER-PREFIXES;
                as-path CUSTOMER-AS;
            }
            then {
                local-preference 100;
                community add CUSTOMER-ROUTE;
                accept;
            }
        }
        term REJECT-ALL {
            then reject;
        }
    }
    policy-statement EXPORT-TO-CUSTOMER {
        term SEND-DEFAULT {
            from {
                prefix-list DEFAULT-ROUTE;
                protocol static;
            }
            then accept;
        }
        term REJECT-EVERYTHING {
            then reject;
        }
    }
}
protocols {
    bgp {
        local-as 65001;
        group UPSTREAM-PROVIDERS {
            type external;
            import IMPORT-FROM-UPSTREAM;
            export EXPORT-TO-UPSTREAM;
            neighbor 192.168.1.2 {
                peer-as 65002;
                description "Upstream Provider - AS65002";
            }
        }
        group CUSTOMER-PEERS {
            type external;
            import IMPORT-FROM-CUSTOMER;
            export EXPORT-TO-CUSTOMER;
            neighbor 192.168.2.2 {
                peer-as 65003;
                description "Customer - AS65003";
            }
        }
    }
}
Verification Steps
After committing, the first thing I do is confirm the sessions are still up. A badly formed policy won't usually reset the session, but it's worth checking immediately after commit.
show bgp summaryYou're looking for
Establin the State column for each peer. If you see
Activeor
Idle, that's a session-level problem unrelated to policy — check your neighbor address, peer-AS, and whether TCP 179 is reachable.
To verify what routes you're receiving from a specific peer and whether your import policy applied the expected attributes:
show route receive-protocol bgp 192.168.1.2
show route receive-protocol bgp 192.168.1.2 detail
The
detailoutput shows communities, local preference, and other attributes that your import policy should have set. Confirm that the communities you expected to add are present and that local-preference values match what you configured. If the default route is arriving with local-preference 150 and the UPSTREAM-PEER community stamped on it, your import policy is working correctly.
For export policy verification, check exactly what you're advertising to a peer after policy is applied:
show route advertising-protocol bgp 192.168.1.2This shows the routes your router is actually sending after applying the export policy. Cross-reference this with your intent — if you expect three prefixes and you see more or fewer, something in your export policy isn't matching what you think it is.
One of the most useful debugging tools in JunOS is the policy simulator. You can test a policy against the routing table without committing anything or touching a live session:
test policy EXPORT-TO-UPSTREAM 172.16.10.0/24
test policy IMPORT-FROM-UPSTREAM 0.0.0.0/0
The output tells you whether the route matched, which term matched it, and what actions were applied. I use this constantly when writing new policies or debugging why a prefix isn't being advertised. It's one of JunOS's genuinely superior troubleshooting features compared to other platforms.
To verify prefix lists resolved correctly after you defined them:
show policy prefix-list CUSTOMER-PREFIXESAnd to verify an AS-path regex is actually matching what you think it will before you rely on it in policy:
show route aspath-regex "^65002$"This shows all routes currently in the routing table that match that expression — a quick sanity check that your regex is syntactically valid and semantically correct.
Common Mistakes
The implicit reject catches more engineers than anything else. You write a beautiful import policy that tags routes with communities and sets local preference, commit it, and then wonder why routes aren't being installed. You forgot a
then accept. Every term that doesn't explicitly accept or reject falls through to the next term, and if nothing matches, the route gets rejected. Always end your policies with a deliberate catch-all, and make sure it's intentional — either accept everything that made it this far, or reject it explicitly.
Confusing
community add,
community set, and
community deletecauses subtle bugs that can take a while to track down.
setreplaces all communities on the route with the ones you specify.
addappends to whatever communities are already present. Use
setwhen you want a clean stamp; use
addwhen the route may already carry communities you need to preserve. I've seen operators use
setin an import policy and inadvertently strip communities sent by the peer that were carrying important traffic engineering signals.
Multiple policies applied to the same neighbor form an ordered chain, evaluated left to right. The first policy that accepts or rejects a route wins — subsequent policies in the chain aren't consulted for that route. So if you have
import [POLICY-A POLICY-B]and POLICY-A accepts everything, POLICY-B is never evaluated for anything. Order matters, and a catch-all accept in an early policy silently swallows all traffic engineering logic in every policy that follows it.
Another common issue: modifying a policy and committing it does not automatically re-evaluate routes that have already been received. Your router won't reprocess existing BGP routes with the new policy unless something triggers a route refresh. To manually trigger this without resetting the session:
clear bgp neighbor 192.168.1.2 soft inThe
soft inflag sends a ROUTE-REFRESH request to the peer, causing it to re-advertise its routes which then get processed through your updated import policy. If you need to trigger re-evaluation of export policy, use
soft outinstead. Avoid a hard session reset in production — it drops the session completely, triggers BGP convergence on the other end, and causes unnecessary traffic disruption.
Finally, don't overlook the interaction between policy and routing instances. If you're running VRFs, a policy applied inside a routing instance operates in that instance's context. A prefix list defined at the global level is accessible from any routing instance, but a policy referencing
protocol bgpin its from conditions matches BGP routes within the instance where the policy is applied. Test in the exact context where the policy will run, not just from the default routing instance.
BGP route policy on Juniper is one of those areas where the fundamentals are straightforward but production environments quickly reveal edge cases. Get comfortable with
test policybefore you commit anything to a live session — it's the single best habit you can build. Once you have a working policy framework in place, extending it for new peers, traffic engineering requirements, or community-based routing decisions becomes a matter of adding terms rather than rethinking the whole structure.