Introduction
When running a high-traffic web application, backend servers quickly become a bottleneck. Nginx's built-in proxy caching module stores upstream responses on disk and serves them directly to clients — dramatically reducing backend load, latency, and bandwidth consumption. Unlike a standalone caching layer such as Varnish, Nginx proxy caching is integrated directly into your existing reverse proxy configuration, making it operationally simpler to deploy and maintain in production.
This guide walks through a complete, production-ready Nginx caching proxy setup on Ubuntu 22.04 running on sw-infrarunbook-01. You will configure cache zones, set TTL policies per location, define bypass rules for authenticated traffic, enable stale content serving during upstream failures, implement microcaching for dynamic pages, and verify that caching is working correctly using curl and access log analysis.
How Nginx Proxy Caching Works
Nginx proxy caching operates at the HTTP response level. When a request arrives at the proxy, Nginx computes a cache key and checks whether a valid entry exists on disk. On a cache hit, the response is served directly from disk without contacting the upstream. On a cache miss, the request is forwarded upstream, the response is stored on disk, and returned to the client.
The cache uses two storage areas: a shared memory zone defined by
keys_zonethat holds metadata and key hashes for fast lookups, and a filesystem directory that stores the actual response bodies. Key lookups happen in the shared memory zone in microseconds. Disk I/O is only required when reading a cached body on a hit or writing a new entry on a miss.
Nginx uses a two-level directory structure within the cache path to prevent filesystem slowdowns caused by too many files in a single directory. Each cache file is named after the MD5 hash of the cache key and distributed across subdirectories based on the final characters of that hash.
Prerequisites
- Nginx installed on sw-infrarunbook-01 running Ubuntu 22.04
- A backend application server listening at 192.168.10.20:8080
- Root or sudo access via the infrarunbook-admin account
- At least 10 GB of free disk space on the partition hosting the cache directory
Step 1: Create the Cache Directory
Create a dedicated directory for cache files and assign ownership to the Nginx worker process user. On Ubuntu, Nginx workers run as www-data by default.
sudo mkdir -p /var/cache/nginx/proxy_cache
sudo chown -R www-data:www-data /var/cache/nginx
Verify the user configured for Nginx worker processes:
grep '^user' /etc/nginx/nginx.confExpected output:
user www-data;. If the user directive shows a different value, update the
chowncommand accordingly.
Step 2: Define the Cache Zone with proxy_cache_path
The
proxy_cache_pathdirective must be placed inside the
http {}block of
/etc/nginx/nginx.conf. It cannot be placed inside a
server {}or
location {}block. Open the main configuration file:
sudo nano /etc/nginx/nginx.confAdd the following inside the
http {}block, before any
includedirectives:
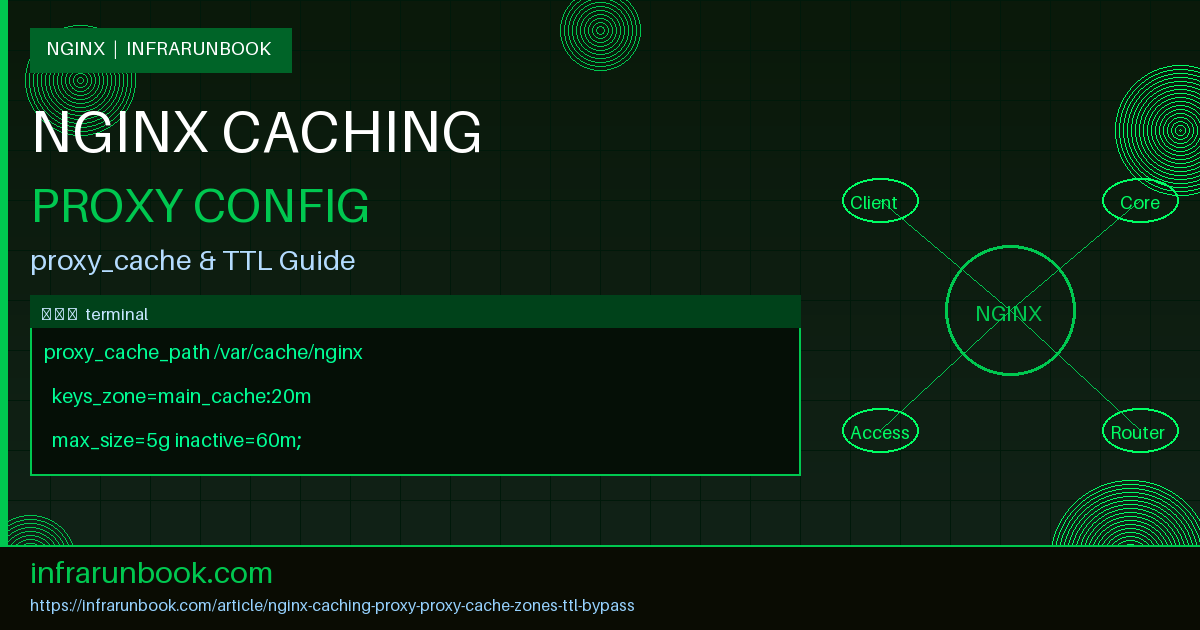
proxy_cache_path /var/cache/nginx/proxy_cache
    levels=1:2
    keys_zone=main_cache:20m
    max_size=5g
    inactive=60m
    use_temp_path=off;
Parameter breakdown:
- levels=1:2 — creates a two-level directory hierarchy with up to 256 subdirectories per level, preventing filesystem performance degradation from thousands of files in a single directory
- keys_zone=main_cache:20m — names the shared memory zone
main_cache
and allocates 20 MB; 1 MB holds approximately 8,000 cache keys, so 20 MB supports roughly 160,000 entries - max_size=5g — caps total cache disk usage at 5 GB; when the limit is reached, Nginx evicts the least recently used entries via a background process called the cache manager
- inactive=60m — removes cache entries that have not been accessed within 60 minutes, regardless of their TTL
- use_temp_path=off — instructs Nginx to write cache files directly to the target directory instead of a temporary path first, reducing disk writes and avoiding potential cross-device rename operations
Step 3: Enable Caching in the Virtual Host
Create or edit the virtual host configuration at
/etc/nginx/sites-available/solvethenetwork.com:
server {
    listen 80;
    server_name solvethenetwork.com www.solvethenetwork.com;

    proxy_cache              main_cache;
    proxy_cache_valid        200 302 10m;
    proxy_cache_valid        404     1m;
    proxy_cache_use_stale    error timeout updating http_500 http_502 http_503 http_504;
    proxy_cache_background_update on;
    proxy_cache_lock         on;
    proxy_cache_lock_timeout 5s;

    add_header X-Cache-Status $upstream_cache_status always;

    location / {
        proxy_pass         http://192.168.10.20:8080;
        proxy_set_header   Host              $host;
        proxy_set_header   X-Real-IP         $remote_addr;
        proxy_set_header   X-Forwarded-For   $proxy_add_x_forwarded_for;
        proxy_set_header   X-Forwarded-Proto $scheme;
    }
}
Key directives explained:
- proxy_cache_valid 200 302 10m — caches 200 OK and 302 Found responses for 10 minutes; TTL begins from the moment the response is stored
- proxy_cache_valid 404 1m — caches negative responses for 1 minute to protect against repeated requests for missing resources
- proxy_cache_use_stale — serves an expired cached response when the upstream returns an error, times out, or returns a 5xx status code
- proxy_cache_background_update on — serves the stale entry immediately while issuing one background request to refresh the cache (stale-while-revalidate pattern)
- proxy_cache_lock on — when multiple requests arrive simultaneously for an uncached resource, only one is forwarded upstream; the rest wait and are served from the newly cached response, preventing a stampede
Step 4: Customizing the Cache Key
The default cache key is
$scheme$proxy_host$request_uri. For most applications, a key based on scheme, hostname, and full URI including query string is correct and efficient:
proxy_cache_key "$scheme$host$request_uri";If your upstream application serves different content based on the
Accept-Encodingheader — for example, pre-compressed gzip responses versus uncompressed — include the encoding in the key:
proxy_cache_key "$scheme$host$request_uri$http_accept_encoding";Warning: Never include session cookies or authentication tokens in the cache key unless you explicitly intend to cache per-user responses. Adding a session cookie to the cache key creates a unique cache entry for every user session, consuming disk space with a near-zero hit rate and negating the benefit of caching entirely.
Step 5: Configuring Cache Bypass and No-Cache Rules
Two directives give precise control over whether the cache is consulted and whether responses are stored:
- proxy_cache_bypass — when the specified variable is non-empty and non-zero, Nginx skips the cache lookup and fetches fresh content from upstream. The fresh response may still be stored unless
proxy_no_cache
is also set. - proxy_no_cache — when the specified variable is non-empty and non-zero, the upstream response is not written to cache, regardless of cache headers.
Use both together to completely skip caching for authenticated or explicitly uncacheable requests:
proxy_cache_bypass $http_pragma $http_authorization $cookie_auth_token;
proxy_no_cache     $http_pragma $http_authorization $cookie_auth_token;
This configuration bypasses and skips storage when any of the following conditions are true:
- The request includes a
Pragma: no-cache
header, which browsers send during a hard refresh (Ctrl+Shift+R) - An
Authorization
header is present, indicating an API call using Bearer token or HTTP Basic authentication - An
auth_token
cookie is set, indicating an active authenticated user session
Place these directives in the
server {}block to apply globally, or inside individual
location {}blocks for fine-grained control.
Step 6: Per-Location Caching Policies
Different application layers have different caching requirements. Static assets benefit from long TTLs measured in hours. API responses may only tolerate a few seconds. Administrative interfaces should never be cached. Here is a complete server block demonstrating layered per-location policies:
server {
    listen 80;
    server_name solvethenetwork.com www.solvethenetwork.com;

    proxy_cache       main_cache;
    proxy_cache_key   "$scheme$host$request_uri";
    proxy_cache_use_stale error timeout updating http_500 http_502 http_503 http_504;
    proxy_cache_lock  on;
    add_header X-Cache-Status $upstream_cache_status always;

    # General pages — 10 minute TTL with bypass for authenticated users
    location / {
        proxy_pass         http://192.168.10.20:8080;
        proxy_cache_valid  200 302 10m;
        proxy_cache_valid  404 1m;
        proxy_cache_bypass $http_pragma $http_authorization;
        proxy_no_cache     $http_pragma $http_authorization;
        proxy_set_header   Host              $host;
        proxy_set_header   X-Real-IP         $remote_addr;
        proxy_set_header   X-Forwarded-For   $proxy_add_x_forwarded_for;
        proxy_set_header   X-Forwarded-Proto $scheme;
    }

    # Static assets — 24 hour TTL, bypass rules explicitly disabled
    location ~* \.(js|css|png|jpg|jpeg|gif|ico|svg|woff2|woff|ttf)$ {
        proxy_pass         http://192.168.10.20:8080;
        proxy_cache_valid  200 24h;
        proxy_cache_bypass "";
        proxy_no_cache     "";
        proxy_set_header   Host $host;
    }

    # API endpoints — 30 second TTL, bypass when Authorization header present
    location /api/ {
        proxy_pass         http://192.168.10.20:8080;
        proxy_cache_valid  200 30s;
        proxy_cache_bypass $http_authorization;
        proxy_no_cache     $http_authorization;
        proxy_set_header   Host      $host;
        proxy_set_header   X-Real-IP $remote_addr;
    }

    # Admin panel — caching completely disabled
    location /admin/ {
        proxy_pass       http://192.168.10.20:8080;
        proxy_cache      off;
        proxy_set_header Host              $host;
        proxy_set_header X-Real-IP         $remote_addr;
        proxy_set_header X-Forwarded-For   $proxy_add_x_forwarded_for;
    }
}
Setting
proxy_cache_bypass ""and
proxy_no_cache ""for static assets overrides any global bypass rules defined in the parent
server {}block, ensuring static files are always cached regardless of authentication headers.
Step 7: Microcaching for High-Traffic Dynamic Content
Microcaching applies a TTL of one second or less to dynamically generated responses. At high request rates — for example, 5,000 requests per second to a popular news page — a 1-second cache means the upstream receives at most one request per second for that URL instead of 5,000. Content remains effectively real-time for end users while backend load is reduced by several orders of magnitude.
Define a separate microcache zone in
/etc/nginx/nginx.confto keep it isolated from the main cache:
proxy_cache_path /var/cache/nginx/microcache
    levels=1:2
    keys_zone=microcache:10m
    max_size=1g
    inactive=10m
    use_temp_path=off;
Apply it to the location block handling high-traffic dynamic content:
location /news/ {
    proxy_pass                    http://192.168.10.20:8080;
    proxy_cache                   microcache;
    proxy_cache_valid             200 1s;
    proxy_cache_lock              on;
    proxy_cache_lock_timeout      500ms;
    proxy_cache_use_stale         updating;
    proxy_cache_background_update on;
    add_header X-Cache-Status     $upstream_cache_status always;
    proxy_set_header Host         $host;
    proxy_set_header X-Real-IP    $remote_addr;
}
proxy_cache_lock onis especially critical in the microcaching scenario. Without it, when the 1-second TTL expires, every concurrent in-flight request would race to the upstream simultaneously — the thundering herd problem. With the lock, only one request is forwarded upstream while all others wait. Once the cache is refreshed, all waiting requests are served the new entry at once. The
proxy_cache_lock_timeout 500msensures that if the upstream is slow, waiting requests do not queue indefinitely.
For maximum performance on a microcache, consider mounting the cache directory on a
tmpfsRAM filesystem. Since entries expire in 1 second and losing the cache on reboot is acceptable, RAM-backed storage eliminates disk I/O entirely:
sudo mkdir -p /var/cache/nginx/microcache
# Add to /etc/fstab for persistence across reboots
tmpfs /var/cache/nginx/microcache tmpfs size=512m,noexec,nosuid 0 0
sudo mount /var/cache/nginx/microcache
Step 8: Understanding Cache Status Values
The
$upstream_cache_statusvariable exposes the cache outcome for each request. Knowing these values is essential for diagnosing cache behavior. Possible values are:
- HIT — response was served from a valid cache entry; the upstream was not contacted
- MISS — no valid cache entry existed; the upstream was contacted and the response was stored
- BYPASS — cache was bypassed due to a matching
proxy_cache_bypass
condition - EXPIRED — a cache entry existed but its TTL had elapsed; the upstream was contacted to refresh it
- STALE — an expired entry was served because the upstream was unreachable and
proxy_cache_use_stale
allowed it - UPDATING — a stale entry was served while a background refresh request is in progress
- REVALIDATED — the upstream returned 304 Not Modified, confirming the cached entry is still valid
- UNCACHEABLE — the response could not be cached because the upstream sent
Cache-Control: no-store
,Cache-Control: private
, or aSet-Cookie
header
Expose the status in the response with the
alwaysflag to ensure it appears even on error responses:
add_header X-Cache-Status $upstream_cache_status always;Step 9: Testing Cache Behavior with curl
After validating and reloading Nginx, test from the command line on sw-infrarunbook-01:
sudo nginx -t && sudo systemctl reload nginx

# First request — expect MISS
curl -sI http://solvethenetwork.com/ | grep -i x-cache-status

# Second request — expect HIT
curl -sI http://solvethenetwork.com/ | grep -i x-cache-status

# Hard refresh simulation — expect BYPASS
curl -sI -H "Pragma: no-cache" http://solvethenetwork.com/ | grep -i x-cache-status

# Authenticated request — expect BYPASS
curl -sI -H "Authorization: Bearer test123" http://solvethenetwork.com/ | grep -i x-cache-status
Expected output:
X-Cache-Status: MISS
X-Cache-Status: HIT
X-Cache-Status: BYPASS
X-Cache-Status: BYPASS
If every request returns MISS or UNCACHEABLE, the most common root causes are:
- The upstream application sends
Cache-Control: no-store
orCache-Control: private
- The upstream sends a
Set-Cookie
header — Nginx will not cache such responses by default - The
proxy_cache
directive references a zone name that does not match thekeys_zone=
name inproxy_cache_path
- The cache directory does not exist, or the Nginx worker user cannot write to it
- A
proxy_cache_bypass
condition is unexpectedly evaluating to true for all requests
Confirm the cache directory is being populated after a few requests:
find /var/cache/nginx/proxy_cache/ -type f | wc -l
du -sh /var/cache/nginx/proxy_cache/
Step 10: Handling Set-Cookie on Static Responses
If your upstream application incorrectly attaches a
Set-Cookieheader to static assets such as images or JavaScript files, Nginx will mark those responses as UNCACHEABLE. You can instruct Nginx to ignore and strip the cookie header for specific location blocks:
location ~* \.(js|css|png|jpg|jpeg|gif|ico|svg|woff2)$ {
    proxy_pass            http://192.168.10.20:8080;
    proxy_cache           main_cache;
    proxy_cache_valid     200 24h;
    proxy_ignore_headers  Set-Cookie;
    proxy_hide_header     Set-Cookie;
    proxy_set_header      Host $host;
}
Caution: Only use
proxy_ignore_headers Set-Cookiefor genuinely static, non-personalized assets. Applying it to dynamic pages or login responses can cause Nginx to cache session cookies and serve them to different users, creating a serious security vulnerability.
Step 11: Monitoring Cache Performance
Add the cache status variable to the Nginx access log to track hit and miss ratios over time. Edit
/etc/nginx/nginx.conf:
log_format cache_log '$remote_addr - [$time_local] "$request" '
                     '$status $body_bytes_sent '
                     'cache=$upstream_cache_status '
                     'upstream_rt=$upstream_response_time';

access_log /var/log/nginx/access.log cache_log;
Reload Nginx and then analyze hit ratios after traffic accumulates:
tail -n 10000 /var/log/nginx/access.log \
  | grep -oP 'cache=\K\w+' \
  | sort | uniq -c | sort -rn
Example output from a healthy caching configuration:
   8241 HIT
    987 MISS
    312 BYPASS
     60 EXPIRED
     12 UPDATING
      3 STALE
A well-tuned cache typically shows 80–95% HIT rates for static assets and 50–80% HIT rates for cacheable dynamic pages, depending on traffic volume and TTL values. A low HIT rate for static assets usually indicates TTLs are too short or the cache key includes unnecessary variation.
Production Tuning Recommendations
- SSD-backed cache directory: Place the cache on NVMe or SSD storage. On a cache miss, disk latency is directly visible to the client as added response time.
- Dedicated disk for high-traffic nodes: Mount a separate disk at
/var/cache/nginx
to isolate cache I/O from application logs and operating system I/O, preventing contention during traffic spikes. - Monitor inode exhaustion: Run
df -i /var/cache/nginx
regularly. Each cache file consumes one inode. A cache storing millions of small files — thumbnails, font files, small JSON responses — can exhaust the inode table of an ext4 filesystem before filling the disk. - Size keys_zone generously: Running out of shared memory causes premature eviction before
max_size
is reached. Allocate shared memory to hold at least 125% of your peak expected cache entry count. - tmpfs for microcache zones: For TTLs of 1–5 seconds, mounting the microcache on a RAM-backed tmpfs eliminates all disk I/O for that cache. Losing the microcache on reboot or remount is acceptable and has no user impact.
- Tune proxy_read_timeout: If upstream response time exceeds
proxy_cache_lock_timeout
, queued requests will be forwarded to the upstream in bulk, partially defeating the stampede prevention. Ensureproxy_read_timeout
is set to a value appropriate for your upstream's P99 response time.