Prerequisites
Before diving into configuration, let's make sure the environment is ready. You'll need Nginx 1.3.13 or later — that's when WebSocket proxying support was introduced. Most modern distros ship with a version well past that, but it's worth confirming before you spend an hour debugging something that structurally cannot work regardless of how you tune it.
On sw-infrarunbook-01, verify the installed version with:
nginx -vYou'll also need a backend WebSocket server already running and reachable on a local port or a set of upstream addresses. For every example in this article, I'll use a WebSocket service running on two internal hosts: 192.168.10.20:3000 and 192.168.10.21:3000. Nginx will terminate TLS on port 443 and proxy WSS traffic down to those plain WS backends over the internal RFC 1918 network. That separation — TLS at the edge, plain traffic internally — is the most common production pattern and what most teams actually want.
Make sure the following is in place before you touch the Nginx config:
- Nginx installed and running (1.3.13 or newer)
- A valid SSL certificate and private key for solvethenetwork.com — Let's Encrypt or an internal CA both work fine
- Backend WebSocket servers running and reachable from sw-infrarunbook-01 on port 3000
- Firewall rules permitting inbound 443 on the Nginx host and internal TCP traffic between the Nginx host and the backends on port 3000
Understanding the WebSocket Handshake
WebSocket connections start their lives as a plain HTTP/1.1 request. The client sends an
Upgrade: websocketheader and a
Connection: Upgradeheader, the server responds with a 101 Switching Protocols, and from that point on the TCP connection stays open as a bidirectional message channel. Both sides can push frames at any time without waiting for the other to initiate.
This is exactly where Nginx needs special handling. By default, Nginx proxies requests to backends using HTTP/1.0 and strips out hop-by-hop headers — which includes
Upgradeand
Connection. If you just drop in a standard
proxy_passdirective without the WebSocket-specific additions, the upgrade handshake never completes. Your client will get a 400 Bad Request, a 502 Bad Gateway, or simply a connection that hangs and then drops. In my experience, this is the first thing that trips up engineers who copy a working REST API proxy config and assume it'll handle WebSocket traffic too. It won't. The protocol requirements are different enough that you need a dedicated location block with the right directives.
Step-by-Step Setup
Step 1 — Define the Upstream Block
Start by defining an upstream group for your WebSocket backend servers. Keeping this separate from your regular application upstream gives you independent load balancing control and a clean reference point in the server block.
upstream ws_backend {
    ip_hash;
    server 192.168.10.20:3000;
    server 192.168.10.21:3000;
    keepalive 64;
}
The
ip_hashdirective is intentional, not just a default I left in. WebSocket is a stateful protocol — once a client establishes a connection, it must continue talking to the same backend for the lifetime of that session. Round-robin would route reconnections to different servers, breaking any per-connection state your backend holds. If you're running a fully stateless WebSocket backend (rare in practice and hard to guarantee), you can drop
ip_hashand use round-robin. In most real applications, keep it.
The
keepalive 64directive tells Nginx to maintain up to 64 idle keepalive connections to upstream servers per worker process. This reduces connection setup overhead under load — instead of tearing down and rebuilding connections, Nginx reuses them. For a busy WebSocket service, this matters.
Step 2 — Redirect HTTP to HTTPS
Don't accept WebSocket connections over plain HTTP. Redirect everything at port 80:
server {
    listen 80;
    server_name solvethenetwork.com;
    return 301 https://$host$request_uri;
}
Step 3 — Configure the HTTPS Server Block with WebSocket Proxying
This is where the actual work happens. There are three directives that make WebSocket proxying work in Nginx. Miss any one of them and the handshake will fail silently or with a cryptic error.
server {
listen 443 ssl;
server_name solvethenetwork.com;
ssl_certificate /etc/nginx/ssl/solvethenetwork.com.crt;
ssl_certificate_key /etc/nginx/ssl/solvethenetwork.com.key;
ssl_protocols TLSv1.2 TLSv1.3;
ssl_ciphers HIGH:!aNULL:!MD5;
location /ws/ {
proxy_pass http://ws_backend;
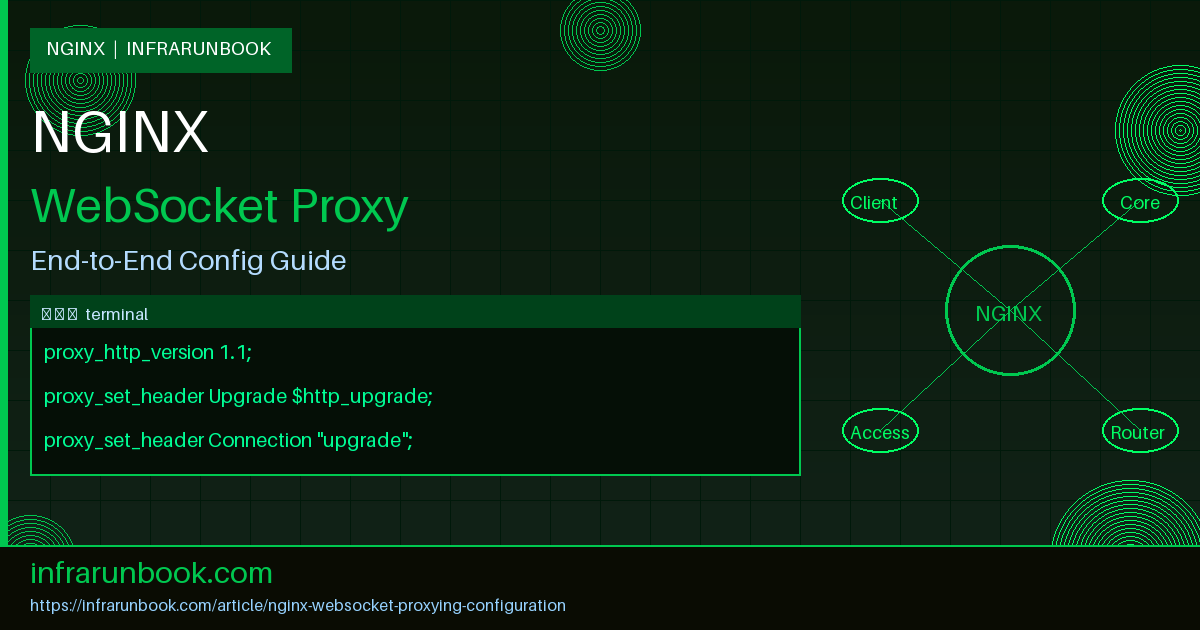
proxy_http_version 1.1;
proxy_set_header Upgrade $http_upgrade;
proxy_set_header Connection "upgrade";
proxy_set_header Host $host;
proxy_set_header X-Real-IP $remote_addr;
proxy_set_header X-Forwarded-For $proxy_add_x_forwarded_for;
proxy_set_header X-Forwarded-Proto $scheme;
proxy_read_timeout 3600s;
proxy_send_timeout 3600s;
proxy_buffering off;
}
}Let me walk through what each of these pieces actually does, because understanding the why will save you hours of debugging later.
proxy_http_version 1.1 — Nginx defaults to proxying with HTTP/1.0. The WebSocket protocol upgrade requires HTTP/1.1. This single missing directive accounts for more broken WebSocket proxy setups than any other mistake. It's not optional.
proxy_set_header Upgrade $http_upgrade — This forwards the
Upgradeheader from the client's request through to the backend. During a WebSocket handshake,
$http_upgradewill hold the value
websocket. For a regular HTTP request, it's empty, so regular traffic through the same server block isn't affected.
proxy_set_header Connection "upgrade" — This one deserves a longer explanation because the intuitive wrong answer is to use
$http_connectionto pass whatever the client sent. Don't do that. Nginx normalizes the
Connectionheader, and the client-sent value can contain tokens like
keep-alive, Upgradethat Nginx may interpret or strip differently than expected. The Nginx documentation explicitly recommends hard-coding the value
"upgrade", and that's what you should do. It's one of those cases where being clever hurts you.
proxy_read_timeout and proxy_send_timeout — These default to 60 seconds. WebSocket connections are designed to stay open for minutes, hours, or days. After 60 seconds of inactivity on an idle connection, Nginx will close it. I've seen this manifest as mysterious client disconnection events that the development team spends days blaming on the WebSocket library, the load balancer, or the network — before finally finding the Nginx timeout. Raise these values to match your application's expected idle time. For a chat application or a dashboard with infrequent updates, 3600 seconds is a reasonable starting point. Pair this with application-level WebSocket ping frames to keep idle connections alive and you'll have a much more stable setup.
proxy_buffering off — Buffering makes sense for standard request/response HTTP traffic where you want Nginx to collect a full response before forwarding it. For WebSocket, you want frames forwarded the instant they arrive. Leaving buffering on adds latency and can cause frames to queue until a buffer fills — the opposite of what any real-time application needs.
Step 4 — Serve Both Regular HTTP and WebSocket Traffic on the Same Domain
Most real applications need to serve a standard HTTP frontend or API alongside WebSocket connections, all on the same domain. Path-based routing handles this cleanly:
location / {
    proxy_pass http://app_backend;
    proxy_set_header Host              $host;
    proxy_set_header X-Real-IP         $remote_addr;
    proxy_set_header X-Forwarded-For   $proxy_add_x_forwarded_for;
    proxy_set_header X-Forwarded-Proto $scheme;
}

location /ws/ {
    proxy_pass http://ws_backend;
    proxy_http_version 1.1;
    proxy_set_header Upgrade           $http_upgrade;
    proxy_set_header Connection        "upgrade";
    proxy_set_header Host              $host;
    proxy_set_header X-Real-IP         $remote_addr;
    proxy_set_header X-Forwarded-For   $proxy_add_x_forwarded_for;
    proxy_set_header X-Forwarded-Proto $scheme;
    proxy_read_timeout  3600s;
    proxy_send_timeout  3600s;
    proxy_buffering off;
}
Regular API and web traffic hits the
app_backendpool. WebSocket traffic at
/ws/hits the dedicated
ws_backendpool with the correct proxy settings. The path split is predictable and easy to reason about in logs and firewall rules alike.
Full Configuration Example
Here's the complete, production-ready configuration for sw-infrarunbook-01. Drop this into
/etc/nginx/conf.d/solvethenetwork.confand adjust paths and IPs to match your environment:
upstream ws_backend {
    ip_hash;
    server 192.168.10.20:3000;
    server 192.168.10.21:3000;
    keepalive 64;
}

upstream app_backend {
    server 192.168.10.20:8080;
    server 192.168.10.21:8080;
    keepalive 32;
}

server {
    listen 80;
    server_name solvethenetwork.com;
    return 301 https://$host$request_uri;
}

server {
    listen 443 ssl;
    server_name solvethenetwork.com;

    ssl_certificate     /etc/nginx/ssl/solvethenetwork.com.crt;
    ssl_certificate_key /etc/nginx/ssl/solvethenetwork.com.key;
    ssl_protocols       TLSv1.2 TLSv1.3;
    ssl_ciphers         ECDHE-ECDSA-AES128-GCM-SHA256:ECDHE-RSA-AES128-GCM-SHA256:ECDHE-ECDSA-AES256-GCM-SHA384:ECDHE-RSA-AES256-GCM-SHA384:!aNULL:!MD5;
    ssl_prefer_server_ciphers on;
    ssl_session_cache   shared:SSL:10m;
    ssl_session_timeout 10m;

    add_header Strict-Transport-Security "max-age=31536000; includeSubDomains" always;

    access_log /var/log/nginx/solvethenetwork_access.log;
    error_log  /var/log/nginx/solvethenetwork_error.log warn;

    # Standard HTTP application
    location / {
        proxy_pass http://app_backend;
        proxy_set_header Host              $host;
        proxy_set_header X-Real-IP         $remote_addr;
        proxy_set_header X-Forwarded-For   $proxy_add_x_forwarded_for;
        proxy_set_header X-Forwarded-Proto $scheme;
    }

    # WebSocket endpoint
    location /ws/ {
        proxy_pass http://ws_backend;

        proxy_http_version 1.1;

        proxy_set_header Upgrade           $http_upgrade;
        proxy_set_header Connection        "upgrade";
        proxy_set_header Host              $host;
        proxy_set_header X-Real-IP         $remote_addr;
        proxy_set_header X-Forwarded-For   $proxy_add_x_forwarded_for;
        proxy_set_header X-Forwarded-Proto $scheme;

        proxy_read_timeout    3600s;
        proxy_send_timeout    3600s;
        proxy_connect_timeout 10s;

        proxy_buffering off;
        proxy_cache     off;
    }
}
Verification Steps
1 — Syntax Check and Reload
Always validate the config before reloading. Never skip this step on a production host:
nginx -tWhen you see
syntax is okand
test is successful, reload the service:
systemctl reload nginx2 — Test the Upgrade Handshake with curl
You can verify the upgrade handshake is being handled correctly with a raw HTTP request. This won't establish a full WebSocket session, but it confirms the server is responding to the upgrade request with a 101:
curl -i -N \
  -H "Connection: Upgrade" \
  -H "Upgrade: websocket" \
  -H "Sec-WebSocket-Key: dGhlIHNhbXBsZSBub25jZQ==" \
  -H "Sec-WebSocket-Version: 13" \
  https://solvethenetwork.com/ws/
A correct response looks like this at the top:
HTTP/1.1 101 Switching Protocols
Upgrade: websocket
Connection: Upgrade
Sec-WebSocket-Accept: s3pPLMBiTxaQ9kYGzzhZRbK+xOo=
If you get a 400 or a 502, work backwards — check the Nginx error log, then verify the backend is running and reachable from sw-infrarunbook-01 on port 3000.
3 — Establish a Real Connection with websocat
websocatis a command-line WebSocket client that makes functional end-to-end testing straightforward. Install it on a test machine and connect:
websocat wss://solvethenetwork.com/ws/If the connection opens and stays open, the proxy is working. Type a test message and verify your backend echoes it back or processes it as expected. This is the most reliable functional test you can run from the command line without writing any application code.
4 — Read the Error Log
When something isn't working, the Nginx error log is always the first place to look. Tail it in real time while you reproduce the issue:
tail -f /var/log/nginx/solvethenetwork_error.logA few common messages and what they mean:
# Backend unreachable — check firewall and that the process is running
connect() failed (111: Connection refused) while connecting to upstream

# Timeout hit — proxy_read_timeout too short for your app's idle time
upstream timed out (110: Connection timed out) while reading response header from upstream

# Protocol mismatch — almost always means proxy_http_version 1.1 is missing
upstream sent invalid header while reading response header from upstream
5 — Confirm Active Connections via Stub Status
If the stub status module is compiled into your Nginx build (it usually is on standard distro packages), add a restricted status endpoint for local monitoring:
location /nginx_status {
    stub_status;
    allow 127.0.0.1;
    deny all;
}
curl http://127.0.0.1/nginx_statusThe
Active connectionscount reflects both open WebSocket sessions and regular HTTP connections. For socket-level detail,
ss -tnp | grep nginxon sw-infrarunbook-01 will show you the actual TCP states and give you a better sense of how many established connections Nginx is holding at any given moment.
Common Mistakes
Omitting proxy_http_version 1.1
This is the most common mistake by a wide margin. Without it, Nginx proxies using HTTP/1.0, which doesn't support the Upgrade mechanism at all. The backend never receives a valid upgrade request. Your client either gets a 400, a 502, or a silent hang. Every single WebSocket location block needs
proxy_http_version 1.1. There are no exceptions.
Using $http_connection Instead of a Hard-Coded Value
The temptation is to write
proxy_set_header Connection $http_connectionto pass the client's header through unchanged. The problem is that
$http_connectioncan contain multiple tokens like
keep-alive, Upgrade, and Nginx's internal header normalization may alter or strip parts of it before it reaches the backend. Hard-code
"upgrade"and move on.
Not Raising the Proxy Timeouts
Nginx's default
proxy_read_timeoutand
proxy_send_timeoutare both 60 seconds. WebSocket connections routinely stay open for far longer than that. After a minute of inactivity, Nginx will quietly close the connection. I've seen this show up as mysterious client drops that the backend team is convinced are their own bug. The application looks fine on the server side, the client is unexpectedly disconnected, and nobody checks the proxy timeouts until they've already burned a day investigating. Set these values to match your application's expected behavior and add WebSocket ping frames on the application side as a complementary keepalive mechanism.
Leaving proxy_buffering Enabled
Response buffering is designed for HTTP request/response cycles where collecting the full response before sending it makes sense. WebSocket frames need to be forwarded the instant they arrive. With buffering on, Nginx holds data until the buffer fills, which introduces latency and defeats the purpose of a real-time protocol. Always set
proxy_buffering offin your WebSocket location block. Don't assume a global
proxy_buffering offin the http block covers you — be explicit in the location block where it matters.
Using Round-Robin Without Sticky Sessions
If your WebSocket backend holds any per-connection state — which the vast majority of WebSocket applications do — you need sticky sessions at the load balancer level. Without them, a client reconnect might land on a different backend with no knowledge of the previous session. Use
ip_hashfor a simple approach. If you're running in a NAT-heavy environment where many clients share a single public IP address,
ip_hashwill create imbalanced load distribution. In that case, look at cookie-based session persistence via Nginx Plus's
stickydirective or implement session state sharing at the application layer.
Losing WebSocket Headers Due to Inherited proxy_set_header Directives
This one is subtle and catches people who try to stay DRY with their Nginx configs. If you define a
proxy_set_headerdirective at the
httpor
serverlevel, Nginx's inheritance rules mean that any
proxy_set_headerin a child
locationblock replaces the parent's headers entirely — they don't merge. If your server block has a global
proxy_set_header Host $hostand your WebSocket location block only adds the Upgrade headers, you might think you're inheriting the Host header from the parent. You're not if the child block defines any
proxy_set_headerat all. Always define all required headers explicitly in the WebSocket location block. Don't rely on inheritance for proxy headers.
Forgetting to Account for SSL Between Nginx and the Backend
The configuration above proxies to plain HTTP backends over the internal network, which is appropriate when backends are on trusted RFC 1918 addresses. If your backend also requires TLS — for example it's on a separate host that enforces mutual TLS — you need to switch to
proxy_pass https://ws_backendand configure
proxy_ssl_trusted_certificateto verify the backend's certificate. Skipping verification with
proxy_ssl_verify offis tempting when you're working with internal certificates, but it leaves you exposed to MITM attacks on your own network. Use your internal CA bundle for verification instead.
WebSocket proxying in Nginx is one of those topics that looks trivially simple once you've done it — three header directives and a timeout value. But arriving at those three directives from first principles, when the protocol is silently failing without a clear error message, can be genuinely frustrating. The HTTP upgrade handshake is a fundamentally different beast from standard request/response proxying, and Nginx's defaults are optimized for the latter. Get
proxy_http_version,
Upgrade, and
Connectionright, set your timeouts to reflect reality, disable buffering, and make sure your sticky session strategy matches your backend's statefulness. Everything else in the configuration is standard reverse proxy work you already know.