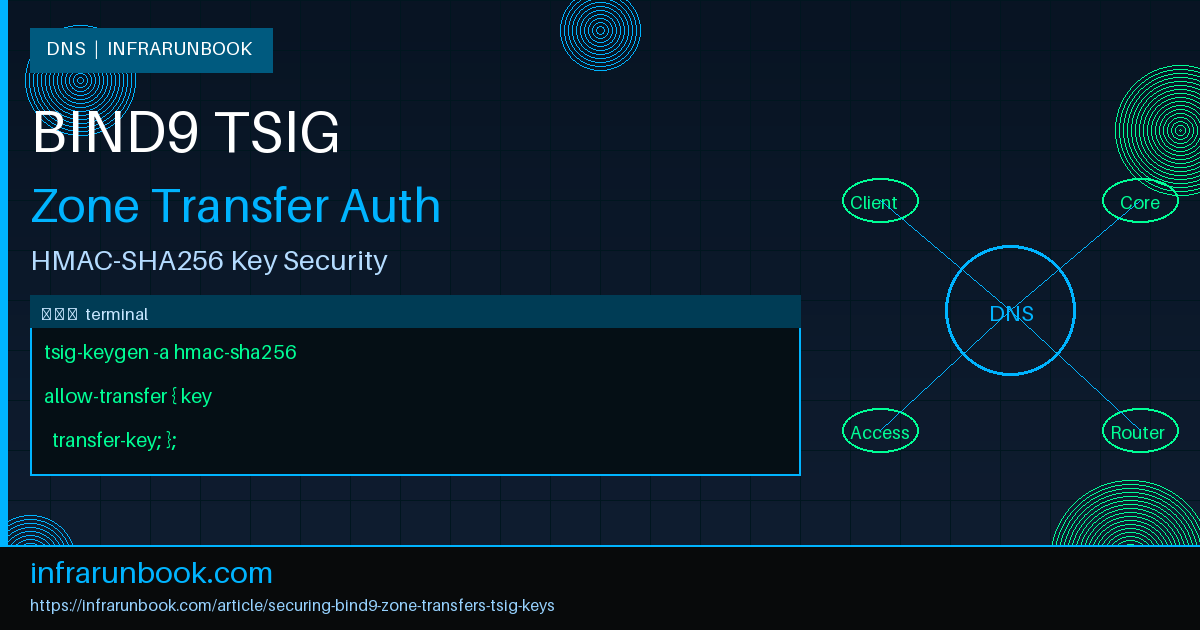
What Is TSIG and Why Does It Matter for DNS Security
Transaction SIGnature (TSIG) is a mechanism defined in RFC 2845 that provides cryptographic authentication for DNS messages, including zone transfers (AXFR/IXFR), dynamic DNS updates, and server-to-server notify messages. Without TSIG, any host that can reach your DNS server on port 53 can request a complete dump of your zone data — exposing every hostname, IP address, mail server record, and internal service you operate.
In production environments, unprotected zone transfers represent a serious reconnaissance risk. An attacker who successfully completes an unauthorized AXFR receives a full map of your network topology at no cost. TSIG eliminates this threat by requiring both sides of a DNS transaction to prove possession of a shared HMAC secret before any data is exchanged.
BIND9 supports TSIG using HMAC-MD5 (legacy, avoid), HMAC-SHA1 (deprecated), HMAC-SHA256, HMAC-SHA384, and HMAC-SHA512. For all new deployments HMAC-SHA256 or HMAC-SHA512 should be used exclusively. This guide uses HMAC-SHA256 throughout.
How TSIG Authentication Works
TSIG operates at the DNS protocol layer by appending a special resource record of type TSIG to each DNS message. The TSIG record contains:
- The algorithm identifier (e.g.,
hmac-sha256
) - The current Unix timestamp (prevents replay attacks)
- A fudge value representing the acceptable clock skew window (default 300 seconds)
- The HMAC signature computed over the full DNS message payload
- The name of the key used for signing
When the receiving server processes the message, it independently computes the HMAC using its own copy of the shared secret. If the computed signature matches the one in the TSIG record, and the timestamp falls within the fudge window, the message is authenticated and processed. If either check fails, the server returns a REFUSED or NOTAUTH response and logs the failure.
This design means two things must be true for TSIG to function reliably: both servers must hold byte-for-byte identical key secrets, and their system clocks must remain synchronized. This makes a working NTP or chrony configuration a hard prerequisite before deploying TSIG.
Lab Environment and Prerequisites
This guide uses the following production-representative environment:
- Primary DNS server: sw-infrarunbook-01 at 192.168.10.10, running BIND9 9.18.x on Ubuntu 22.04
- Secondary DNS server: sw-infrarunbook-02 at 192.168.10.11, running BIND9 9.18.x on Ubuntu 22.04
- Zone under management: solvethenetwork.com
- Administrative user: infrarunbook-admin (sudo access on both hosts)
Before proceeding, verify clock synchronization on both servers:
timedatectl statusConfirm you see
System clock synchronized: yes. If not, install and start chrony before continuing:
apt install chrony -y
systemctl enable --now chrony
chronyc tracking
Also confirm BIND9 is installed and operational on both hosts:
systemctl status namedStep 1 – Generate the TSIG Key on the Primary Server
BIND9 ships with
tsig-keygen, a dedicated utility that generates a cryptographically random base64-encoded secret and outputs a complete BIND9 key{} block ready for inclusion in your configuration. Run this on sw-infrarunbook-01:
tsig-keygen -a hmac-sha256 solvethenetwork-transfer-keyThe output will look similar to the following (your secret value will differ):
key "solvethenetwork-transfer-key" {
        algorithm hmac-sha256;
        secret "4xK9mB2vLpQrN7wYjCdTzUeAoHsGfI3R8WnXyZuJ5Ek=";
};
Create a dedicated directory for TSIG key files and save the output directly to a file:
mkdir -p /etc/bind/tsig-keys
chown root:bind /etc/bind/tsig-keys
chmod 750 /etc/bind/tsig-keys

tsig-keygen -a hmac-sha256 solvethenetwork-transfer-key \
    > /etc/bind/tsig-keys/solvethenetwork-transfer.key

chown root:bind /etc/bind/tsig-keys/solvethenetwork-transfer.key
chmod 640 /etc/bind/tsig-keys/solvethenetwork-transfer.key
The
640permission ensures the
bindprocess can read the key while no other unprivileged user can access the secret. The key directory itself is set to
750for the same reason.
Security note: Never commit TSIG key files to a version control repository. Never reuse the same key across environments. Treat the base64 secret with the same sensitivity as a password.
Step 2 – Configure the Primary BIND9 Server
On sw-infrarunbook-01, open
/etc/bind/named.confand add an include directive to load the key file:
include "/etc/bind/tsig-keys/solvethenetwork-transfer.key";Next, add a
serverblock that instructs BIND9 to automatically sign all outgoing messages destined for the secondary server IP with this key. Add this block to
/etc/bind/named.conf:
server 192.168.10.11 {
    keys { solvethenetwork-transfer-key; };
};
This server block covers notify messages, AXFR responses, and IXFR responses sent to sw-infrarunbook-02. Any DNS message leaving the primary toward 192.168.10.11 will be signed.
Now update your zone declaration in
/etc/bind/named.conf.localto require TSIG authentication for all inbound zone transfer requests:
zone "solvethenetwork.com" {
    type primary;
    file "/etc/bind/zones/db.solvethenetwork.com";
    allow-transfer { key solvethenetwork-transfer-key; };
    also-notify { 192.168.10.11; };
    notify yes;
};
The
allow-transfer { key solvethenetwork-transfer-key; }directive tells BIND9 to accept AXFR and IXFR requests only when they carry a valid TSIG signature from a client that holds this exact key. Any unsigned request, or a request signed with a different key, will receive a REFUSED response.
Reload BIND9 to apply the new configuration:
systemctl reload namedConfirm there are no configuration errors:
named-checkconf
journalctl -u named --since "1 minute ago"
Step 3 – Copy the Key File to the Secondary Server
The secondary must have an identical copy of the key file. Transfer it securely using scp from sw-infrarunbook-01:
scp /etc/bind/tsig-keys/solvethenetwork-transfer.key \
    infrarunbook-admin@192.168.10.11:/tmp/solvethenetwork-transfer.key
On sw-infrarunbook-02, move the key into place and set permissions:
mkdir -p /etc/bind/tsig-keys
chown root:bind /etc/bind/tsig-keys
chmod 750 /etc/bind/tsig-keys

mv /tmp/solvethenetwork-transfer.key \
    /etc/bind/tsig-keys/solvethenetwork-transfer.key

chown root:bind /etc/bind/tsig-keys/solvethenetwork-transfer.key
chmod 640 /etc/bind/tsig-keys/solvethenetwork-transfer.key
Verify the file contents on the secondary match the primary exactly. Use md5sum to compare:
# On sw-infrarunbook-01
md5sum /etc/bind/tsig-keys/solvethenetwork-transfer.key

# On sw-infrarunbook-02
md5sum /etc/bind/tsig-keys/solvethenetwork-transfer.key
Both hashes must be identical. A mismatch here will cause BADSIG errors once BIND9 is configured.
Step 4 – Configure the Secondary BIND9 Server
On sw-infrarunbook-02, open
/etc/bind/named.confand add the key include and server block:
include "/etc/bind/tsig-keys/solvethenetwork-transfer.key";

server 192.168.10.10 {
    keys { solvethenetwork-transfer-key; };
};
Define the zone as a secondary in
/etc/bind/named.conf.local. Use the
primariesdirective with an explicit key reference:
zone "solvethenetwork.com" {
    type secondary;
    file "/var/cache/bind/db.solvethenetwork.com";
    primaries { 192.168.10.10 key solvethenetwork-transfer-key; };
    allow-notify { 192.168.10.10; };
};
The
primariesdirective with the key reference ensures that refresh SOA queries, AXFR requests, and IXFR requests sent from the secondary to the primary are all signed with the correct TSIG key.
Check the configuration and reload:
named-checkconf
systemctl reload named
BIND9 will initiate a zone transfer immediately after reload. Watch the journal for confirmation:
journalctl -u named -fA successful transfer produces a log entry similar to this:
named[1234]: transfer of 'solvethenetwork.com/IN' from 192.168.10.10#53:
  Transfer completed: 1 messages, 22 records, 648 bytes, 0.002 secs
Step 5 – Verify Zone Transfer Behavior with dig
Testing both authenticated and unauthenticated paths confirms that your TSIG configuration is enforced correctly.
First, attempt an unauthenticated AXFR — this must be rejected:
dig @192.168.10.10 solvethenetwork.com AXFRExpected result — the transfer is refused and no zone data is returned:
; Transfer failed.
;; communications error to 192.168.10.10#53: end of file
Now test an authenticated AXFR using the TSIG key file with the
-kflag:
dig @192.168.10.10 solvethenetwork.com AXFR \
    -k /etc/bind/tsig-keys/solvethenetwork-transfer.key
A successful authenticated transfer returns the full zone contents and ends with transfer statistics:
;; Query time: 4 msec
;; SERVER: 192.168.10.10#53(192.168.10.10) (TCP)
;; WHEN: Tue Mar 25 14:22:11 UTC 2026
;; XFR size: 22 records (messages 1, bytes 648)
Common error codes you may encounter during testing:
- BADSIG – The HMAC signature did not verify. Secrets do not match between the two key files.
- BADKEY – The key name in the request is not recognized by the server. Verify spelling and case of the key name in all configuration files.
- BADTIME – Clock skew between client and server exceeds the fudge window. Resynchronize NTP immediately.
- NOTAUTH – The presented key is valid but not listed in the zone's
allow-transfer
directive.
Step 6 – Covering Multiple Zones with One Key Pair
If you operate multiple zones on the same primary-secondary pair, a single TSIG key can authenticate all zone transfers between those two servers. Reference the same key in the
allow-transferdirective of each zone on the primary:
zone "solvethenetwork.com" {
    type primary;
    file "/etc/bind/zones/db.solvethenetwork.com";
    allow-transfer { key solvethenetwork-transfer-key; };
    also-notify { 192.168.10.11; };
};

zone "10.168.192.in-addr.arpa" {
    type primary;
    file "/etc/bind/zones/db.192.168.10";
    allow-transfer { key solvethenetwork-transfer-key; };
    also-notify { 192.168.10.11; };
};
On the secondary, define each zone using the same key in the primaries directive. The single server{} block and key inclusion already handle all zones automatically — no additional per-zone key configuration is needed on the secondary side.
Step 7 – Rotating TSIG Keys Without Service Disruption
TSIG keys should be rotated periodically — at minimum annually, and immediately upon any suspected compromise. The rotation must be carefully sequenced to avoid a window where zone transfers fail because one server is using a key the other no longer recognizes.
Follow this overlap rotation procedure:
- Generate a new key on the primary and save it to a new file:
tsig-keygen -a hmac-sha256 solvethenetwork-transfer-key-v2 \ > /etc/bind/tsig-keys/solvethenetwork-transfer-v2.key chown root:bind /etc/bind/tsig-keys/solvethenetwork-transfer-v2.key chmod 640 /etc/bind/tsig-keys/solvethenetwork-transfer-v2.key - Copy the new key file to the secondary using scp.
- On the secondary, add an include for the new key file in
named.conf
while keeping the old include in place. Reload named. - On the primary, add an include for the new key file, then update the
server{}
block and allallow-transfer
directives to reference the new key name. Reload named. - Verify zone transfers succeed using
dig -k
with the new key file. - Remove the old key include from both servers and reload to complete the rotation.
This two-phase approach ensures both servers simultaneously recognize both keys during the transition window, eliminating any risk of transfer failures.
Step 8 – Using TSIG to Secure Dynamic DNS Updates
TSIG authentication is equally important for securing RFC 2136 dynamic DNS updates. If any host performs self-registration via
nsupdate, require a TSIG key for those updates rather than relying on IP-based allow-update rules.
Generate a dedicated DDNS key, separate from the transfer key:
tsig-keygen -a hmac-sha256 solvethenetwork-ddns-key \
    > /etc/bind/tsig-keys/solvethenetwork-ddns.key
chown root:bind /etc/bind/tsig-keys/solvethenetwork-ddns.key
chmod 640 /etc/bind/tsig-keys/solvethenetwork-ddns.key
Include the key and add an update-policy block to the zone definition on the primary:
include "/etc/bind/tsig-keys/solvethenetwork-ddns.key";

zone "solvethenetwork.com" {
    type primary;
    file "/etc/bind/zones/db.solvethenetwork.com";
    allow-transfer { key solvethenetwork-transfer-key; };
    update-policy {
        grant solvethenetwork-ddns-key zonesub A AAAA TXT;
    };
};
This configuration permits holders of the DDNS key to add or update A, AAAA, and TXT records within the zone, but prevents modification of SOA or NS records. Test a dynamic update from a client host:
nsupdate -k /etc/bind/tsig-keys/solvethenetwork-ddns.key << EOF
server 192.168.10.10
zone solvethenetwork.com
update add dev-host.solvethenetwork.com 300 A 192.168.10.50
send
EOF
Enabling TSIG Debug Logging in BIND9
During initial configuration and troubleshooting, enabling detailed TSIG and zone transfer logging in BIND9 saves significant time. Add this logging block to
/etc/bind/named.conf.options:
logging {
    channel tsig_debug {
        file "/var/log/named/tsig.log" versions 3 size 5m;
        severity debug 3;
        print-time yes;
        print-severity yes;
        print-category yes;
    };
    category security { tsig_debug; };
    category xfer-in { tsig_debug; };
    category xfer-out { tsig_debug; };
};
Create the log directory and set ownership before reloading:
mkdir -p /var/log/named
chown bind:bind /var/log/named
systemctl reload named
Tail the log during a test transfer to see detailed TSIG validation steps:
tail -f /var/log/named/tsig.logOnce TSIG is confirmed working, dial back the logging severity to
infoto avoid filling disk with debug output in production.
Security Hardening Checklist
Before considering this configuration production-ready, verify each of the following:
- All TSIG key files are owned
root:bind
with permissions640
- The
/etc/bind/tsig-keys/
directory has permissions750
- No zone anywhere uses
allow-transfer { any; }
- Algorithm is HMAC-SHA256 or HMAC-SHA512 — not HMAC-MD5 or HMAC-SHA1
- NTP or chrony is running and synchronized on all DNS servers
- TSIG key files are not present in any git repository or backup system accessible to non-administrators
- Key rotation is documented in your change management calendar (minimum annually)
- NOTIFY messages are sent only to known secondary IPs via
also-notify
- Firewall rules restrict port 53 TCP (used for zone transfers) to known DNS peer IPs only
- TSIG key names and rotation schedule are documented in your internal DNS runbook
Related Articles
- [DNS] Configuring BIND9 Response Policy Zones (RPZ) for DNS Firewall Protection – Production Guide
- [DNS] How to Configure DNSSEC on BIND9 (Ubuntu) – Complete Step-by-Step Guide
- [DNS] Configuring Dynamic DNS (DDNS) with BIND9 and nsupdate – Production Guide
- [DNS] Configuring Split-Horizon DNS with BIND9 Views on Ubuntu – Production Guide