How to Install Nginx on Ubuntu 22.04 (Complete Guide)
Nginx (pronounced engine-x) is one of the most popular and reliable web servers used today. It is known for high performance, low memory usage, and the ability to handle large numbers of concurrent connections efficiently. Whether you are setting up a simple website, a reverse proxy, or a production-grade API server, Nginx is often the first choice.
In this article, we’ll walk through installing, configuring, securing, and troubleshooting Nginx on Ubuntu 22.04. This guide is written in a practical, human-friendly way, covering not just how to install Nginx, but also why certain steps are important and what problems you might face in real environments.
What You’ll Learn in This Guide
By the end of this article, you’ll know:
- Different ways to install Nginx on Ubuntu 22.04
- How to start, stop, and manage the Nginx service
- How to configure the firewall properly for Nginx
- Where Nginx configuration files live and what they do
- Common permission and ownership issues (and how to fix them)
- Real-world troubleshooting steps for common Nginx problems
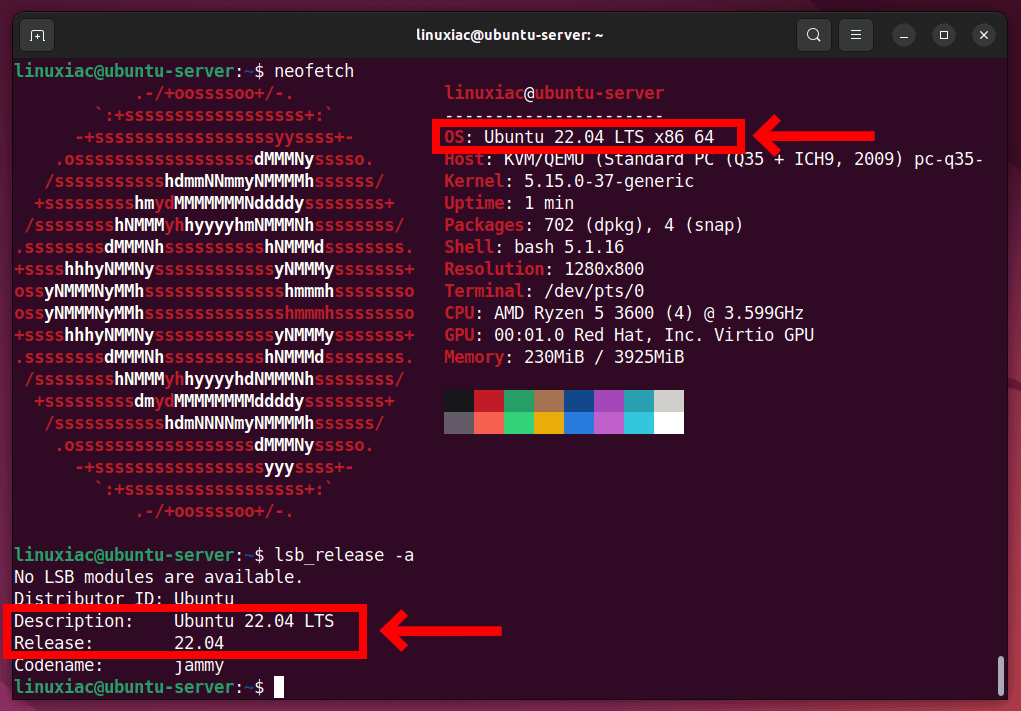
This guide assumes you are working on a fresh Ubuntu 22.04 server with sudo access.
Understanding Nginx on Ubuntu
Before installing, it helps to understand how Nginx is structured on Ubuntu systems.
- Nginx runs as a systemd service
- The master process runs as root
- Worker processes usually run as www-data
- Configuration is modular and split into multiple files
- Ubuntu packages are stable and security-patched regularly
This structure is important when debugging permission issues or configuration errors later.
Method 1: Install Nginx from Ubuntu Repositories (Recommended)
This is the most common and safest method for most users.
Step 1: Update the System Package Index
Always refresh the package index before installing anything:
sudo apt update
This ensures you install the latest available version from Ubuntu’s repositories.
Step 2: Install Nginx
Install Nginx using apt:
sudo apt install nginx -y
Once installed, Ubuntu automatically registers Nginx as a system service.
Step 3: Verify Nginx Installation
Check if Nginx is running:
systemctl status nginx
You should see:
- Service status: active (running)
- No errors in the output
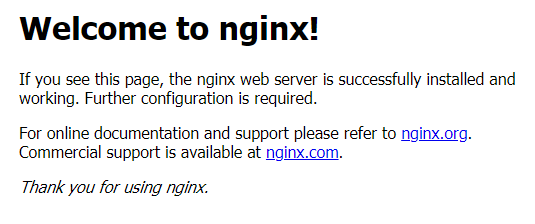
Step 4: Test in Browser
Open a browser and visit your server’s IP address:
http://your_server_ip
If everything is working, you’ll see the default Nginx welcome page.
Method 2: Install Nginx from the Official Nginx Repository
Use this method if you need:
- Newer Nginx versions
- Specific features not available in Ubuntu’s default package
This method is common in production environments.
When Should You Use This?
- You require latest stable Nginx
- You are comfortable managing repository updates
- You want official upstream builds
For most beginners, Method 1 is enough.
Managing the Nginx Service
Once installed, you’ll often need to control Nginx.
Start Nginx
sudo systemctl start nginx
Stop Nginx
sudo systemctl stop nginx
Restart Nginx
sudo systemctl restart nginx
Reload Configuration (No Downtime)
sudo systemctl reload nginx
Reload is preferred after configuration changes because it avoids dropping active connections.
Firewall Configuration for Nginx (UFW)
Ubuntu 22.04 commonly uses UFW (Uncomplicated Firewall).
Step 1: Check Available Nginx Profiles
sudo ufw app list
You’ll usually see:
- Nginx Full (HTTP + HTTPS)
- Nginx HTTP
- Nginx HTTPS
Step 2: Allow Web Traffic
For normal web servers:
sudo ufw allow 'Nginx Full'
If you only want HTTP (port 80):
sudo ufw allow 'Nginx HTTP'
Step 3: Enable Firewall (If Not Enabled)
sudo ufw enable
Then verify:
sudo ufw status
Make sure ports 80 and 443 are allowed.

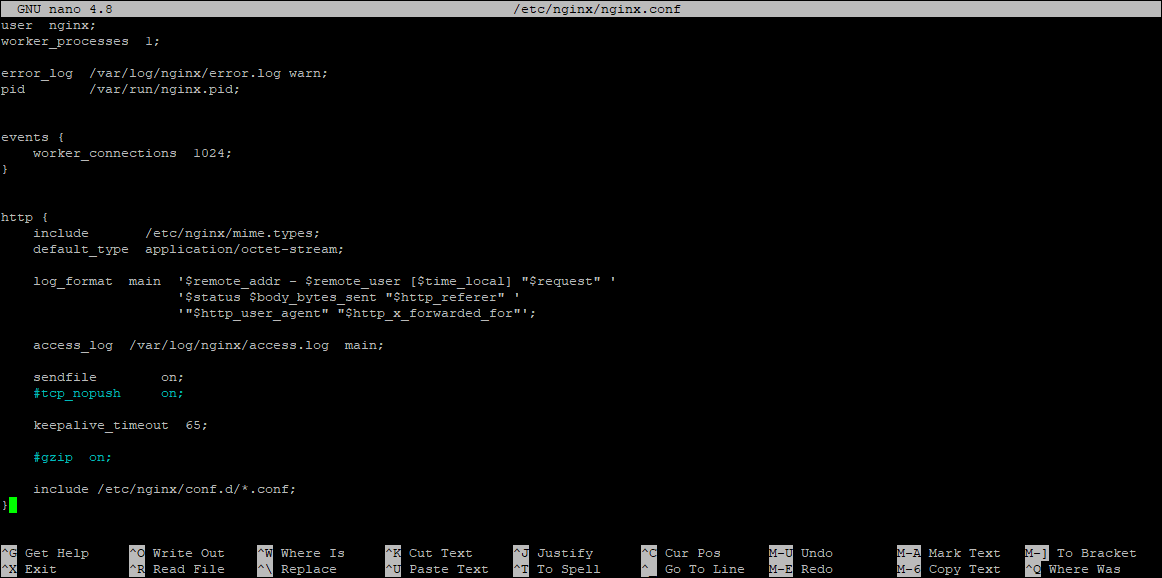
Important Nginx Paths on Ubuntu 22.04
Understanding file locations saves hours of troubleshooting.
Configuration Files
- Main config:
/etc/nginx/nginx.conf
- Site configurations:
/etc/nginx/sites-available/
- Enabled sites (symlinks):
/etc/nginx/sites-enabled/
Web Root
- Default web root:
/var/www/html
Logs
- Access log:
/var/log/nginx/access.log
- Error log:
/var/log/nginx/error.log
Creating a New Server Block (Virtual Host)
Avoid modifying the default site directly. Instead, create a new site file.
Example path:
/etc/nginx/sites-available/example.com
Then enable it using a symbolic link to:
/etc/nginx/sites-enabled/
This modular approach makes maintenance easier and safer.
Permissions and Ownership Issues (Very Common)
One of the most frequent problems users face is 403 Forbidden or blank pages.
Why This Happens
- Nginx runs as
www-data
- Files owned by another user may not be readable
- Directory permissions are too restrictive
Correct Ownership
Set ownership like this:
sudo chown -R www-data:www-data /var/www/example.com
Correct Permissions
Recommended permissions:
- Directories:
755
- Files:
644
Example:
sudo chmod -R 755 /var/www/example.com
Important Rule
Nginx must be able to read:
- The directory
- Parent directories
- The actual files
Even one blocked parent directory can cause access errors.
Testing Nginx Configuration Safely
Before restarting Nginx, always test the configuration:
sudo nginx -t
If you see:
syntax is ok test is successful
You’re safe to reload or restart.
If there’s an error, Nginx will tell you exact file and line number, which is extremely helpful.
Common Nginx Issues and Troubleshooting
1. Nginx Fails to Start
Symptoms
systemctl status nginx
shows failed- Port already in use
Fix
Check if another web server is running:
sudo ss -tulnp | grep :80
Stop Apache if installed:
sudo systemctl stop apache2
2. 403 Forbidden Error
Causes
- Wrong permissions
- Incorrect root path
- SELinux-like restrictions (less common on Ubuntu)
Checklist
- Check file ownership
- Check directory permissions
- Verify
root
path in server block - Review error logs
3. Changes Not Reflecting
Causes
- Forgot to reload Nginx
- Browser cache
- Wrong site enabled
Fix
sudo systemctl reload nginx
Also confirm the correct config file is symlinked in
sites-enabled.
4. Default Page Still Showing
Reason
Your new site is not active or has lower priority.
Fix
- Disable default site:
sudo rm /etc/nginx/sites-enabled/default
- Reload Nginx
Log-Based Debugging (Best Practice)
When in doubt, logs never lie.
View Error Logs Live
sudo tail -f /var/log/nginx/error.log
View Access Logs
sudo tail -f /var/log/nginx/access.log
Most production issues can be solved by carefully reading error logs.
Security Best Practices After Installation
- Remove unused default site
- Restrict permissions strictly
- Enable HTTPS (Let’s Encrypt)
- Disable unnecessary modules
- Keep Nginx updated regularly
These steps are critical for real-world servers.
Final Thoughts
Installing Nginx on Ubuntu 22.04 is straightforward, but running it correctly requires understanding permissions, firewall rules, and configuration structure.
If you:
- Use Ubuntu’s default packages
- Configure UFW correctly
- Respect file ownership and permissions
- Always test configurations before reload
You’ll have a stable, secure, and production-ready Nginx setup.
This guide is intentionally detailed so you can confidently manage Nginx not just today, but long-term in real environments.