In today’s internet, running a website over HTTPS is no longer optional. Modern browsers actively warn users when a site is not secure, search engines prefer HTTPS websites, and many APIs and integrations simply refuse to work without SSL.
If you already have a website running on Nginx and Ubuntu, the next mandatory step is redirecting all HTTP traffic to HTTPS. This ensures that:
- All traffic is encrypted
- Users never land on an insecure version of your site
- SEO signals are consolidated to a single secure URL
- Session cookies and credentials are protected
In this article, we’ll go step by step and explain how to properly redirect HTTP to HTTPS in Nginx on Ubuntu, using infrarunbook.com as the example domain.
This guide is written in a human, practical style, covering configuration, common mistakes, permissions, firewall rules, and real-world troubleshooting.
Prerequisites (Important – Don’t Skip)
Before setting up an HTTP → HTTPS redirect, these conditions must already be true:
- Nginx is installed and running
- Your website is already accessible over HTTP
- You have a valid SSL certificate (Let’s Encrypt or commercial)
- Port 443 is open in the firewall
If you haven’t installed Nginx yet, stop here and follow our installation guide first:
How to Install Nginx on Ubuntu 22.04 – Complete Step-by-Step Guide
if you don't have your website Vhost configured to run it on port 80, follow our installation guide first:
How to Set Up a Basic Website Using Nginx in Ubuntu
Once Nginx is installed and serving your site, come back to this article.
Why HTTP to HTTPS Redirection Matters
Let’s be clear—this is not just a “nice-to-have” feature.
Redirecting HTTP to HTTPS:
- Prevents users from accessing insecure URLs
- Avoids duplicate content issues in SEO
- Ensures cookies are sent securely
- Protects login forms and API requests
- Builds trust with users and browsers
Google Chrome, Firefox, and Safari all label HTTP sites as “Not Secure”. Redirecting HTTP to HTTPS eliminates this risk completely.
Understanding How Nginx Handles HTTP and HTTPS
Nginx treats HTTP and HTTPS as separate server blocks.
- HTTP → listens on port 80
- HTTPS → listens on port 443
Redirecting HTTP to HTTPS means:
- Accept traffic on port 80
- Immediately return a redirect response
- Send users to the HTTPS version of the same URL
This should be done at the server block level, not inside application code.
Step 1: Verify Your SSL Certificate Exists
Before writing redirect rules, confirm that your SSL certificate is present.
Most commonly, certificates are located at:
/etc/letsencrypt/live/infrarunbook.com/
You should see:
fullchain.pem
privkey.pem
If these files do not exist, do not proceed.
Install SSL first (Let’s Encrypt or otherwise), then come back.
Step 2: Confirm Firewall Allows HTTPS Traffic
Even a perfect redirect won’t work if port 443 is blocked.
Check UFW status:
sudo ufw status
If HTTPS is not allowed, enable it:
sudo ufw allow 'Nginx Full'
Or explicitly:
sudo ufw allow 443/tcp
Step 3: Identify Your Existing Nginx Configuration
Your site configuration should be located here:
/etc/nginx/sites-available/infrarunbook.com
If you followed best practices, it is already enabled via:
/etc/nginx/sites-enabled/infrarunbook.com
We will now modify this file safely.
Step 4: Create the HTTP → HTTPS Redirect Server Block
Open your site configuration file:
sudo nano /etc/nginx/sites-available/infrarunbook.com
HTTP Server Block (Port 80)
This block does nothing except redirect:
server {
listen 80;
server_name infrarunbook.com www.infrarunbook.com;return 301 https://infrarunbook.com$request_uri;
}
Why This Is the Correct Way
301
→ Permanent redirect (SEO-friendly)$request_uri
→ Preserves full URL path and query- No document root needed
- Fast and clean
Step 5: Configure the HTTPS Server Block (Port 443)
Below the redirect block, add your HTTPS configuration:
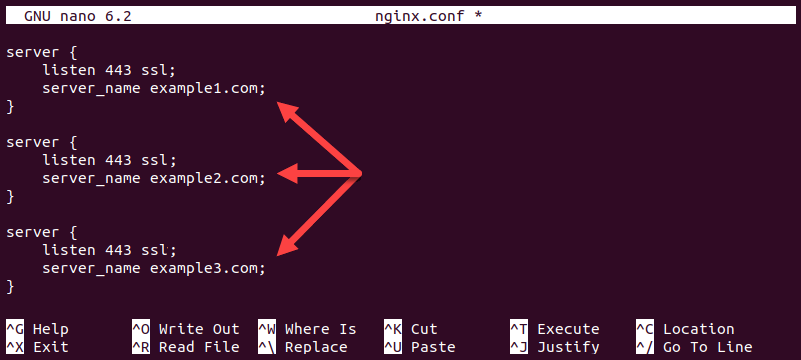
server {
listen 443 ssl;
server_name infrarunbook.com www.infrarunbook.com;root /var/www/infrarunbook.com/public_html;
index index.html index.htm;ssl_certificate /etc/letsencrypt/live/infrarunbook.com/fullchain.pem;
ssl_certificate_key /etc/letsencrypt/live/infrarunbook.com/privkey.pem;access_log /var/log/nginx/infrarunbook.com.access.log;
error_log /var/log/nginx/infrarunbook.com.error.log;location / {
try_files $uri $uri/ =404;
}
}
This ensures:
- All HTTPS traffic is properly served
- SSL certificates are explicitly defined
- Logs are separated per site
Step 6: Test Nginx Configuration (Never Skip)
Before applying changes:
sudo nginx -t
Expected output:
syntax is ok test is successful
If there is any error, fix it before proceeding.
Reload Nginx:
sudo systemctl reload nginx
Step 7: Verify the Redirect Works
Open a browser and visit:
http://infrarunbook.com
You should be automatically redirected to:
https://infrarunbook.com
To test from CLI:
curl -I http://infrarunbook.com
Expected response:
HTTP/1.1 301 Moved Permanently Location: https://infrarunbook.com/
Common Problems and Troubleshooting
Let’s cover real-world issues you may face.
Issue 1: Redirect Loop Error
Symptoms
- Browser shows “Too many redirects”
Cause
- Redirect logic added inside HTTPS block
- Multiple conflicting redirect rules
Fix
- Redirect must exist only in port 80 block
- HTTPS block should never redirect to itself
Issue 2: HTTPS Works, HTTP Doesn’t Redirect
Checks
- Port 80 open?
- Correct
server_name
? - Correct site enabled?
Verify enabled configs:
ls -l /etc/nginx/sites-enabled/
Issue 3: Certificate Errors in Browser
Causes
- Wrong certificate path
- Expired certificate
- Domain mismatch
Check certificate files:
ls -l /etc/letsencrypt/live/infrarunbook.com/
Issue 4: 403 Forbidden After HTTPS Redirect
Cause
- File permissions issue
Verify ownership:
sudo chown -R www-data:www-data /var/www/infrarunbook.com
Verify permissions:
sudo find /var/www/infrarunbook.com -type d -exec chmod 755 {} \;
sudo find /var/www/infrarunbook.com -type f -exec chmod 644 {} \;
Nginx Logs: Your Best Debugging Tool
Always check logs before guessing.
Error Log
/var/log/nginx/infrarunbook.com.error.log
Access Log
/var/log/nginx/infrarunbook.com.access.log
Watch logs live:
sudo tail -f /var/log/nginx/infrarunbook.com.error.log
Best Practices for HTTP to HTTPS Redirects
- Use 301 redirects, not 302
- Redirect at Nginx level, not app level
- Keep HTTP server block minimal
- Never duplicate SSL config in port 80 block
- Always test with
nginx -t
- Monitor certificate expiry
These practices prevent SEO loss and production outages.
Final Thoughts
Redirecting HTTP to HTTPS in Nginx on Ubuntu is a critical security and SEO step. When done correctly, it is simple, clean, and extremely reliable. The key is understanding that HTTP and HTTPS are separate concerns and must be handled with separate server blocks.
If your Nginx installation or base website setup isn’t ready yet, make sure you’ve followed our earlier guides first—especially the installation article.
Once HTTPS redirection is in place, your website becomes:
- More secure
- More trusted by browsers
- More SEO-friendly
- Ready for production traffic
If you want, the next articles can cover:
- Enforcing HTTPS with HSTS
- Let’s Encrypt auto-renewal
- Redirecting www to non-www
- Advanced SSL hardening